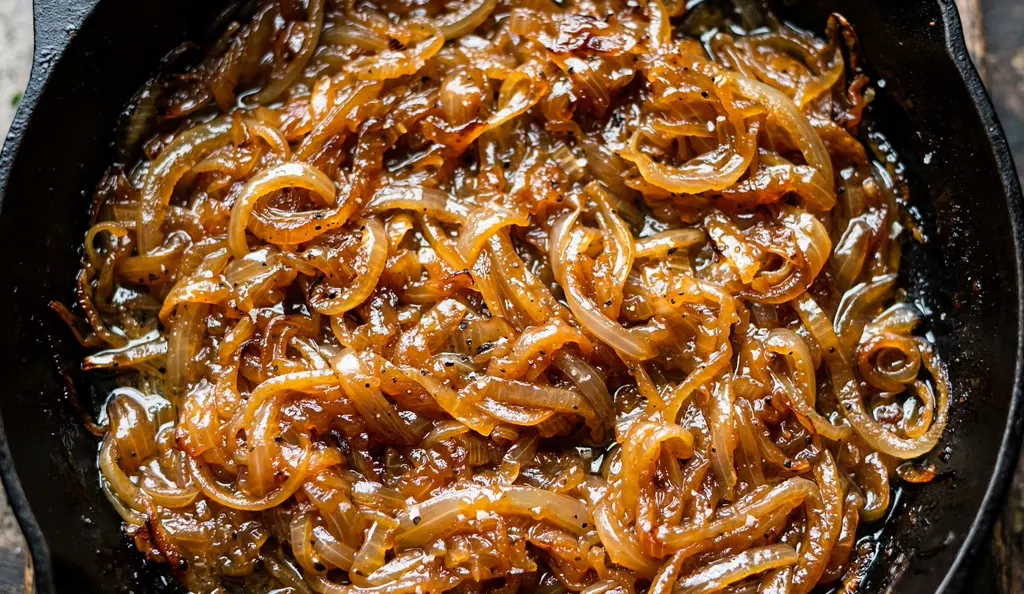
Wondering how to caramelize onions without burning them? Slice yellow onions thin, cook them low and slow in a little fat with a pinch of salt, and stir every few minutes for 40 to 50 minutes until they turn deep brown and jammy. This October 2026 guide walks you through every step, ratio, timing trick, and fix.
Caramelized onions are one of the cheapest flavor upgrades in any kitchen. This guide teaches you how to caramelize onions the slow, reliable way, with no guesswork. You will learn which onions to buy, how thin to slice them, how much fat and salt to use, and exactly when to stir or splash in water. We will cover the science in plain words, the best pan to use, and the mistakes that turn sweet onions bitter. The National Onion Association reports that Americans eat just over 20 pounds of onions per person each year. As of October 2026, the slow method below still beats every shortcut on flavor. Let us start with the answer most people want first: the timing.
How Long Does It Take to Caramelize Onions?
Caramelizing onions takes 40 to 55 minutes on the stovetop for a standard 2-pound batch in a 12-inch skillet over medium-low heat. Thinner slices and a wider pan speed things up, while a crowded pan slows everything down. Expect light browning around minute 15 and deep jammy color by minute 40. Patience is the real ingredient.
Why Do Onions Turn Sweet When You Cook Them Slowly?
A raw onion tastes sharp because of sulfur compounds. But it also hides a surprising amount of sugar. According to USDA data quoted by Food52 in 2023, a medium onion weighing about 110 grams holds around 4.7 grams of sugar, roughly 1.2 teaspoons. Fresh onions are also nearly 90 percent water.
Food scientist Harold McGee explains in his book On Food and Cooking that onions store energy in long chains of fructose sugars. Slow cooking breaks those chains down and frees the sweetness. As the water evaporates, the sugars concentrate and start to brown.
Two reactions create the flavor. The first is caramelization, which is sugar breaking down under heat alone. The second is the Maillard reaction, which happens when sugars meet amino acids. A December 2025 article from Science Times explains that caramelization happens above 160°C (320°F), while the Maillard reaction needs both protein and sugar. Both reactions fire while you learn how to caramelize onions the patient way.
The National Onion Association published a caramelizing skill sheet in April 2020 with exact temperatures. Fructose starts to caramelize at 230°F, and glucose starts at 320°F. Fructose creates the deepest color of all. That is why sweet onions with more fructose brown a little faster.
Picture a cook in Chicago making French onion soup on a cold evening. She slices a mountain of yellow onions at 5 p.m. By 6 p.m. they have shrunk to a third of their size. They smell like candy and look like amber syrup. She never touched the heat dial. Slow heat did all the work.
Which Onions Are Best for Caramelizing?
Yellow onions are the best all-around pick for learning how to caramelize onions. They have a balanced mix of sugar and sulfur, so they turn deep brown with sweet-savory flavor. Sweet varieties like Vidalia and Walla Walla work well too, with less bite. Use the table below to pick the right onion for your dish.
| Onion Type | Flavor After Cooking | Best Use |
|---|---|---|
| Yellow | Balanced sweet and savory | French onion soup, burgers, pizza |
| Sweet (Vidalia, Walla Walla) | Sweeter, milder, lower sulfur | Tarts, dips, mild sauces |
| Red | Sweet with a mild tang | Flatbreads, grain bowls, chutneys |
| White | Clean and gentle | Tacos, quesadillas, Mexican dishes |
| Shallots | Silky and delicate | Pan sauces, small fancy batches |
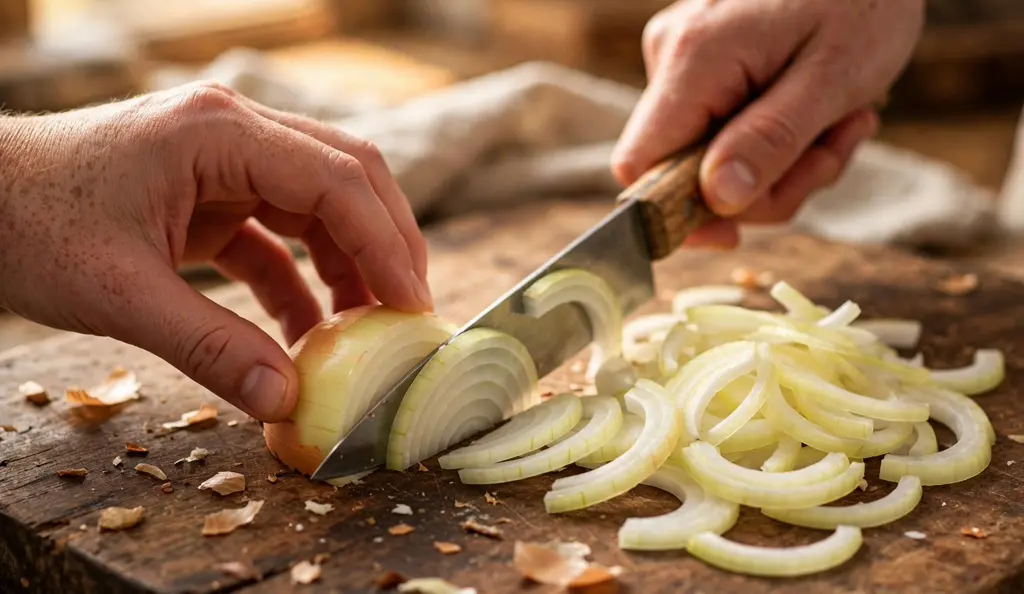
Avoid using giant Spanish onions if the slices are very thick. Thick slices take longer to cook through. Aim for uniform 1/4-inch slices no matter which variety you choose. Uniform slices brown at the same pace.
How to Caramelize Onions, Step by Step
This October 2026 method works on any stovetop, gas or electric. The ratio stays the same whether you cook 2 pounds or 4. Just do not crowd the pan. If the pile looks deeper than 2 inches, use a wider pan or cook in two batches.
What you need:
- 2 pounds yellow onions (about 4 medium onions)
- 2 tablespoons fat: butter, olive oil, or 1 tablespoon of each
- 1 teaspoon kosher salt
- 2 to 4 tablespoons water, stock, or dry wine for deglazing
- Optional: 1/8 teaspoon baking soda per pound to speed browning
- A 12-inch heavy skillet, cast iron or stainless steel
The method:
- Trim the root and tip of each onion. Halve through the root end, peel, and slice pole to pole into 1/4-inch half-moons. Keep the slices as even as you can.
- Warm the fat in the skillet over medium-low heat until it shimmers. Add the onions and the salt. Toss everything to coat the slices in fat.
- Spread the onions into an even layer. Cover the pan for 5 minutes to jump-start the softening, then take the lid off.
- Cook for 10 minutes, stirring every 2 to 3 minutes. The onions will soften and turn translucent.
- Keep cooking for 15 to 20 minutes more. Stir every few minutes. When browned bits stick to the pan and darken, splash in a tablespoon of water and scrape them up.
- Cook 10 to 20 minutes more, until the onions are deep mahogany and glossy. They should look like jam, not soup.
- Taste a spoonful. If you want a brighter edge, add a tiny splash of vinegar or lemon juice. Pull the pan off the heat.
The full process takes 40 to 55 minutes for this batch size. Do not raise the heat to finish faster. High heat burns the sugars before the water cooks off, and the onions turn bitter. Anyone who has learned how to caramelize onions properly will tell you the same thing: the clock is part of the recipe.
How Do Heat, Pan, and Stirring Change the Result?
Three controls decide your result: heat, pan, and stirring rhythm. Get all three right and the onions almost caramelize themselves. Get one wrong and you wait an hour for pale onions.
The Heat Sweet Spot
Medium-low heat is the zone you want. You should hear a gentle sizzle, not a loud crackle. If the pan goes silent, the heat is too low and you are just steaming the onions. If the onions darken fast in the first 10 minutes, the heat is too high. Lower it and add a splash of water.
Pan Choice
A 12-inch stainless steel or cast iron skillet gives the best results. Both build flavorful browned bits, called fond, on the bottom. Fond dissolves back into the onions when you deglaze. Nonstick pans work too, but they brown more slowly and the fond never sticks as well. A wide pan beats a deep pot because moisture escapes faster.
The Stirring Rhythm
Stir every few minutes, not constantly. The onions need quiet contact time with the hot pan to brown. Stirring nonstop keeps cooling them down and stretches the clock. Forgetting them for 15 minutes lets them burn. Set a mental timer: stir when you think of it, roughly every 3 to 5 minutes.
Salt Timing
Salt at the start pulls water out of the onions and speeds up softening. That is good. Season lightly again at the very end to balance the sweetness. If you want faster browning, hold the salt back until the onions look soft, then add it. Less water early means browning starts sooner.
5 Mistakes That Turn Sweet Onions Bitter
Most failed batches come from one of five mistakes. Each one is easy to fix once you know what to watch for.
1. Cooking on High Heat
High heat scorches the sugars before the water leaves the onions. The result is black edges with a raw center. Keep the heat at medium-low the whole time. Slow heat is the entire secret of how to caramelize onions.
2. Crowding the Pan
Too many onions in a small pan trap steam. Steam keeps the temperature near 212°F, which is too low for browning. The onions stew instead of caramelize. Spread them out or cook in two batches.
3. Stirring Too Often
Constant stirring drops the pan temperature and washes the browning back off. It also breaks the slices into mush. Give the onions a few quiet minutes between stirs so they can build color on the pan surface.
4. Skipping the Deglaze
The browned bits on the pan, the fond, hold most of the flavor. If you let them burn, they turn bitter. Splash in a tablespoon of water or stock when the fond looks dark, and scrape it back into the onions. This one move fixes most bitter batches.
5. Walking Away Near the End
The last 10 minutes are the danger zone. The onions have little water left, so they can go from perfect to scorched in minutes. Stay near the stove and stir more often as the color deepens.
The Gluten-Free Twist: Where Restaurant Caramelized Onions Can Hide Wheat
Plain onions are naturally gluten free, and homemade caramelized onions are safe for gluten-free kitchens. The risk shows up away from home. Restaurant caramelized onions often cook on shared flat tops next to breaded foods, burger buns, or dishes glazed with regular soy sauce. That creates cross-contact, which means gluten touches a gluten-free food by accident.
Ask the restaurant staff before ordering. Ask whether the onions share the cooking surface with breaded items or wheat-based sauces. If you live with celiac disease, check with your doctor or a registered dietitian about restaurant-made dishes before making them a regular habit.
Store-bought jars of caramelized onions deserve a label check too. Some brands add flavorings or thickeners that contain wheat. In the United States, a product labeled gluten free must meet the FDA rule of under 20 parts per million of gluten. Always read the current label, because recipes and ingredients change.
At home, the safest deglazing liquids are water, stock, or wine. If you like deglazing with soy sauce, use a gluten-free tamari or a soy sauce labeled gluten free instead of the regular kind. Our guide to whether soy sauce is gluten free explains which bottles are safe. This October 2026 update keeps that advice current.
Chef Tamar Adler, author of An Everlasting Meal, urges cooks to make a big batch of caramelized onions whenever they have an hour free. Julia Child helped make French onion soup famous with American home cooks, and that soup shines with a thick cap of toasted bread. For the gluten-free version, top it with slices of gluten free bread instead of wheat bread. Caramelized onions might be the easiest way to make gluten-free cooking taste rich and slow-cooked.
How Do You Store and Reheat Caramelized Onions?
Let the onions cool to room temperature, then pack them into an airtight container. The USDA Food Safety and Inspection Service advises using cooked leftovers within 3 to 4 days in the refrigerator. Our guide on how long leftovers last in the fridge covers the same food safety rules in more detail.
For longer storage, freeze them. Spread the cooled onions in a freezer bag and press it flat so it thaws fast. They keep their flavor for up to 3 months in the freezer.
The Ice-Cube-Tray Trick
Portion the cooled onions into a silicone ice cube tray and freeze. Pop the cubes out into a freezer bag. Each cube is the perfect amount to top a burger or stir into soup. Drop a frozen cube straight into a hot skillet with a spoon of water to reheat in 2 minutes.
What Should You Do With a Whole Pan of Caramelized Onions?
A full batch makes about 1 and 1/2 cups. That sounds small for 2 pounds of onions, but the flavor is so deep that a spoonful transforms a whole dish. Use your stash across the week:
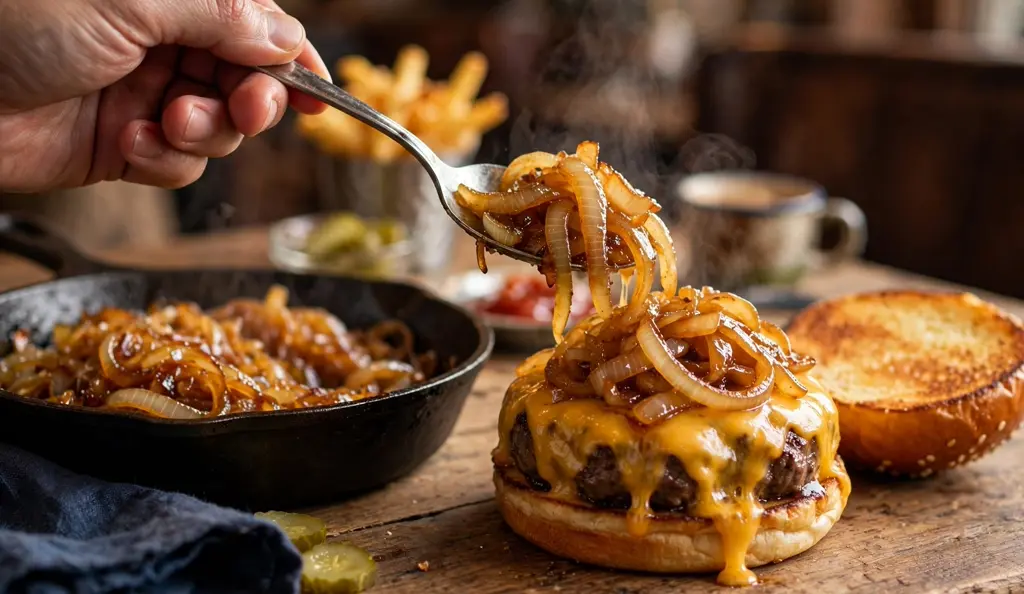
- Pile them on burgers, patty melts, or grilled cheese for instant steakhouse flavor.
- Spread them over gluten free pizza before baking, or scatter them on flatbreads with blue cheese.
- Top toasted gluten free bread with onions and goat cheese for a fast appetizer.
- Build the best French onion soup you have ever made, with a gluten-free bread cap and melted cheese.
- Swirl them into sour cream for a 2-minute onion dip at parties. Our gluten free appetizers guide has more party ideas.
- Fold them into mashed potatoes, polenta, or risotto for deep savory notes.
Should You Add Sugar When You Caramelize Onions?
No, added sugar is optional. Onions already hold enough natural sugar to turn deep brown and sweet on their own. A tiny pinch can speed color along when you are short on time. Too much sugar makes syrupy onions that burn fast. For clean flavor, skip it and let slow heat do the work.
Frequently Asked Questions About Caramelizing Onions
Can I caramelize onions faster in 10 minutes?
No, not truly. Ten minutes of high heat gives you browned onions, not caramelized ones. Real caramelizing needs 40 to 55 minutes of slow heat to break down sugars and build deep flavor. Shortcuts taste fine, but they never reach the same jammy sweetness.
Do I need butter, or is oil fine?
Both work. Butter adds rich dairy notes and browns a little faster. Olive oil or avocado oil handles long cooks without any risk of burning milk solids. A half-and-half blend gives nutty depth and steady performance. Use what you have.
Which onion is best for caramelizing?
Yellow onions are the best default choice for learning how to caramelize onions. They balance sugar and sulfur for deep sweet-savory flavor. Sweet onions like Vidalia brown a bit faster. Red onions add color and a mild tang to grain bowls and flatbreads.
Why are my onions still pale after 30 minutes?
The pan is probably crowded, or the heat is too low. Spread the onions in a wider pan so steam can escape. You can also nudge the heat up slightly from low to medium-low. Stir every few minutes and give them 15 more minutes.
Why do my onions taste bitter?
Bitter flavor almost always comes from scorched fond on the pan. Lower the heat, splash in a tablespoon of water, and scrape up the browned bits before they burn. A tiny splash of vinegar or lemon at the end also balances any harsh edges.
Can I caramelize onions in the oven?
Yes. Toss sliced onions with oil and salt on a parchment-lined sheet pan. Roast at 400°F for 40 to 55 minutes, stirring every 10 minutes, until deep brown and jammy. The oven method needs less babysitting and handles very large batches well.
Can I caramelize onions in a slow cooker?
Yes, but it is slow. Add sliced onions, fat, and salt to a slow cooker on LOW for 8 to 10 hours, stirring a few times. Leave the lid slightly open for the last few hours to drive off liquid. The result is very jammy but less deeply browned than stovetop.
Can I freeze caramelized onions?
Absolutely. Cool them fully, then freeze in flat freezer bags or ice cube trays for up to 3 months. Frozen cubes reheat in a skillet with a spoon of water in about 2 minutes. This is the easiest way to keep a ready supply for weeknight dinners.
How long do caramelized onions last in the fridge?
Store them in an airtight container in the refrigerator and use within 3 to 4 days. Cool them quickly after cooking and keep the container sealed. If they smell sour or look slimy, throw them out and make a fresh batch.
Can I make caramelized onions ahead for a party?
Yes, they are perfect make-ahead food. Cook a big batch up to 3 days before the event and refrigerate. Reheat gently in a skillet with a splash of water or stock. You can also freeze the party batch weeks ahead and thaw overnight in the fridge.
Are caramelized onions gluten free?
Plain homemade caramelized onions are naturally gluten free. Watch out for restaurant versions cooked on shared surfaces with breaded foods, and check labels on store-bought jars for wheat-based flavorings or thickeners. When deglazing at home, use a gluten-free tamari instead of regular soy sauce.
What is the difference between caramelized and sauteed onions?
Sauteed onions cook fast over medium-high heat for 5 to 10 minutes until soft and lightly golden. Caramelized onions cook low and slow for 40 to 55 minutes until deep brown and jammy. The long cook breaks down sugars and creates a completely different, candy-like flavor.
Do I need to add water while caramelizing onions?
Only when the pan needs it. Splash in a tablespoon of water when the browned bits look dark and the pan goes dry. The water lifts the flavor back into the onions. Do not pour in large amounts, or you will steam the onions instead of caramelizing them.
Can I caramelize red onions?
Yes, red onions caramelize well and keep a lovely deep purple-brown color. They taste a little tangier than yellow onions. They are great on flatbreads, grain bowls, and sandwiches. Slice and cook them the same way as yellow onions.
The Last Word on Caramelized Onions
Learning how to caramelize onions comes down to three habits: low heat, a wide pan, and a 45-minute window of patience. Pick yellow onions, slice them evenly, salt them early, and deglaze whenever the fond darkens. Make a full batch and freeze the extra in ice cube trays for burgers, soup, and pizza all month. Store the fridge batch for 3 days and the freezer stash for 3 months. Low heat, a wide pan, and patience will out-cook every shortcut, every single time.
Want the deeper science? Read the caramelization entry on Wikipedia.